Decoupage step by step
 decoupage
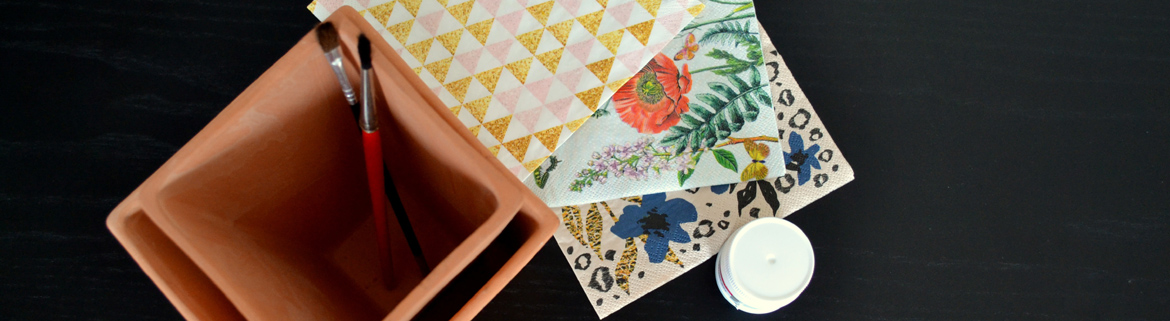
Decoupage is an ideal activity to liven up your long winter nights. Because it is not difficult, children can do it as well. If you have not yet known or tried it, get inspired by our technique.
Decoupage is not only a fashion matter of recent years. This technique is at least 2,000 years old. It was very popular in the 17th century when furniture was decorated in oriental-style and it was also a hobby for the upper class. Even the French Royal Court was interested in it during the reign of Louis XV. Its name decoupage comes from French, from the word “decouper”, which means to cut out or cut from something. Originally, decoupage had a slightly different form than today – it involved layering of various materials, mostly paper, and its basis was always some kind of a story.
Make an original gift
Decoupage is not very difficult, it only requires a few skills, so it is also suitable for beginners and children. You need a decoupage glue and paper napkins. You will also need sharp scissors and a brush. Finally, you smear the surface with transparent varnish. In craft shops, you can also find a glue and a varnish in one, both in matt and shiny finishes.
With decoupage, you can easily decorate almost everything from wood, paper, stone, plastic, terracotta, metal to textiles. You can even cover peeled colour with it and breath a new life into your old furniture and accessories, or you can make an original gift.
How to decoupage?
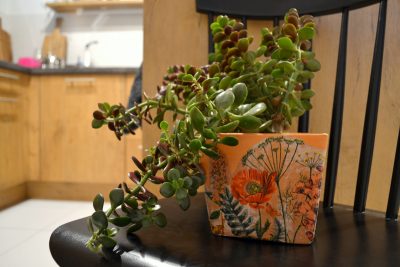
We will now showcase the decoupage technique. To decorate the terracotta flower pot, you will need paper napkins. We chose napkins with distinctive luminous flowers on a neutral pale background. There are plenty of lovely paper napkins on the market with different designs. However, it is always necessary to consider the combination of the background and the colours on the napkin, for example blue flowers would get lost on a blue background. Next you will need a glue and a varnish in one, a pair of scissors and a brush.
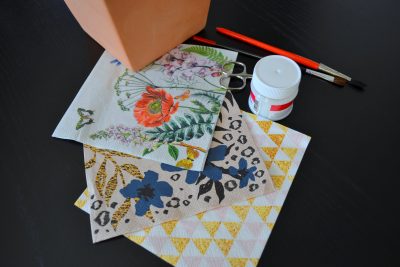
We decided to keep the terracotta flower pot in its original form, but you can paint it with acrylic paint before you start. Ideally with pale paint because the motif might not be visible on the dark colour. If you use paint, apply it in two layers and wait until it dries. Decoupage after.
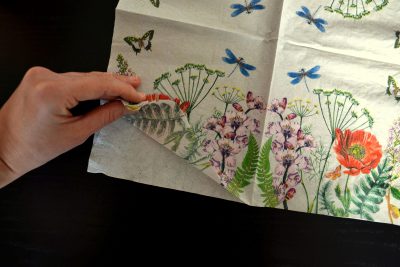
Choose a suitable motif on a paper napkin and cut out the picture. Paper napkins always consist of several layers (two or three), you will only need the top layer with the image. Put the selected motif on the flower pot and apply the glue. Do not be scared of the white coat, it will become translucent after drying.
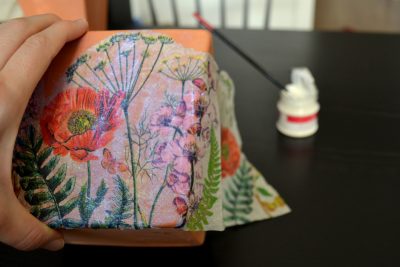
Carefully smooth the napkin with a brush but be careful not to tear it off. With bigger motifs, that we also decided for, start smoothing from the centre to the edges. It is easier to smooth any wrinkles or bubbles this way. Since we already used the glue and a varnish, final varnishing is not needed. In the craft shops, you will also find a glue with a varnish for glaze ceramics. Put the decorated item into the oven at 140 °C for 5 minutes and then wash it.
Infographics: Napkin folding for kids’ party
Is your child celebrating birthday and you are throwing a party?...
Show more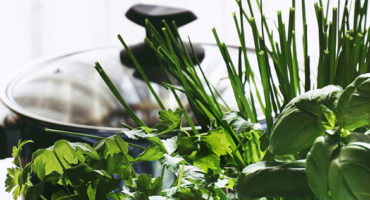
Herbs – tasty and useful decoration
Herbs in the kitchen are both tasty and useful decoration....
Show more
Cleaning mirrors can sometimes be a toil
Everyone knows that breaking a mirror brings 7 years of...
Show more