5 tips on how to use facial tissues
 cosmetic wipes
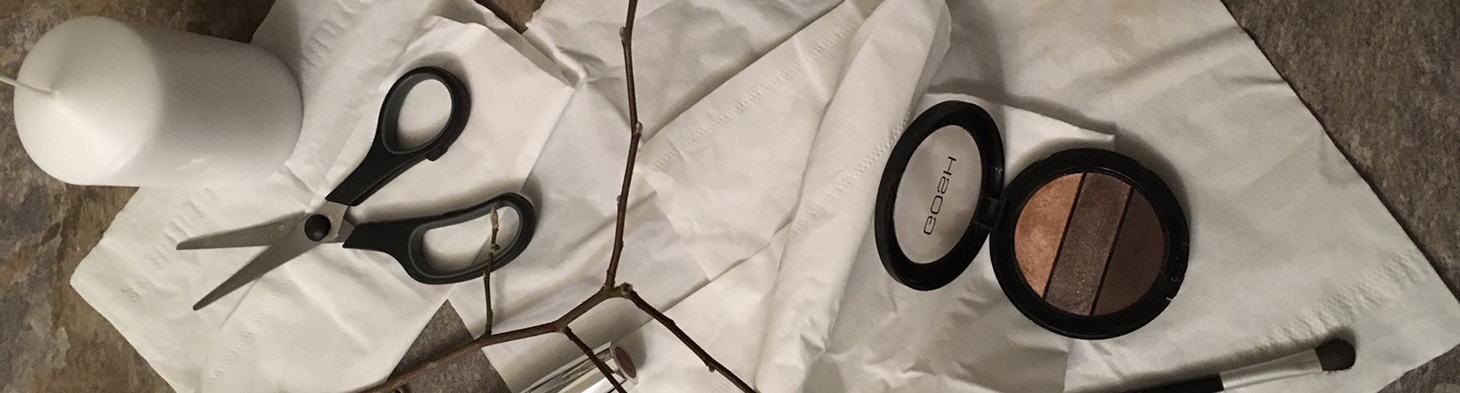
Most people choose facial tissues as a practical substitute for cloth napkins. Someone may prefer their decorative packaging and add them to their cozy interior. With a bit of creativity, you can create a nice gift with these helpers or make your make up perfect! How to do it?
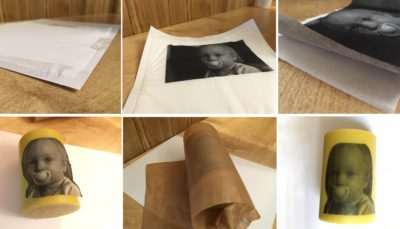
Make your own personalized candle
Decorative candle is an ideal gift (not only) for your grandparents. You can decorate it, for example, with photos of your family or with a drawing of your children. And making such a candle does not take more than 10 minutes. You only need a larger candle, scotch tape, facial tissue, baking paper and a hairdryer.
If you want to apply a photo or any picture on the candle, tape a facial tissue down with a scotch tape on a paper and imprint any pattern you want. For your own drawing, simply paint (you or your children) a facial tissue with colored pencils (but careful not to damage the tissue). The following steps are the same as with the picture.
Cut out the pattern or the picture from the facial tissue and carefully remove the bottom layer of the tissue. Then place the picture on the candle and wrap it in the baking paper so that it encircles it all. Hold the baking paper on the back firmly with one hand and with your other hand use the hairdryer until wet spots appear on the paper. The wax will start to melt, and the picture will merge with the candle. When all the parts of the tissue are merged with the picture, the gift is ready.
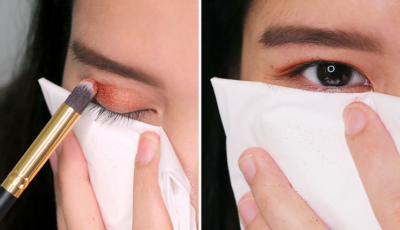
Protection against falling eye shadows
We recommend this trick to the lovers of glittering eyeshadows. Before you start playing with your eyeshadows, put a facial tissue under your eye. It will catch all the fall outs that would otherwise color not only your eyelids.
Source: beautymnl.com
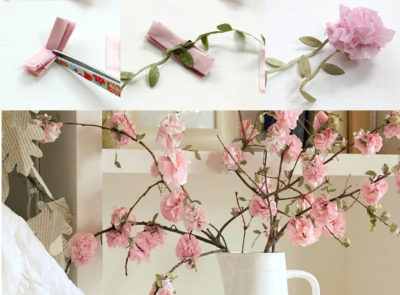
Decorative cherry blossoms
If you like blooming treetops and don´t want to wait until spring comes, make your own twigs with cherry blossoms. Prepare your basic tools – facial tissues, scissors, ruler, tree twigs and ribbon in the form of fake leaves.
First cut the ribbon to 12 cm long strips. Cut the facial tissues to be 6.5 x 7.5 cm. Create stacks of 5 pieces of cut tissues. Fold the stacks several times as if you were making a fan. Cut the center of the created stripe on both sides and tie with the ribbon so that it fits into the prepared cut-ins (see Pic.). Then just unfold the layers of the tissues and create a flower that you can tie to the twig.
If you have white tissues, color the flowers with pink (or other) chalk. Finally, put the twigs into a vase and enjoy a decorative result that you do not even need to water, yet it never wilts!
Source: happyhappynester.com
Make your lipstick matt
Would you like to give your lips a matt look? The procedure is very simple. Separate the layers of the facial tissue and press against your lips. Apply a little transparent powder over the tissue using a brush. Finally, just check the final look.

Source: beautymnl.com
Skin cleansing
The problematic T-zone, forehead, nose and chin are the struggle areas of many women. If your skin is generally oily, during the day you can gently wipe off excess sweat and oils with a facial tissue that can perfectly remove unwanted shine. You can also help yourself when applying makeup. Gentle wiping removes excess coat on the cheeks and forehead.
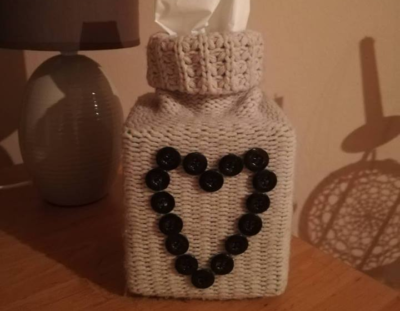
What about the box?
You can decorate the box yourself. Use, for example, a sleeve from an old knitted sweater – tie the cut side of the sleeve with an elastic band and make the box look nice. Then you can store anything in the empty box, imagination knows no boundaries.
Do you know the benefits of Shea and Avocado Butters?
Trying to live better and healthier life is now quite...
Show more
Get inspired: 10 bathroom designs
What’s your dream bathroom? With a huge freestanding bathtub and...
Show more
Hand hygiene: How to wash them properly and what to dry them with?
In October we remember the Global Handwashing Day. At first...
Show more
Infographics: Napkin Folding for Easter
The Easter holidays include many customs that vary from country...
Show more