Decoupage: Christmas ornaments
 Christmas
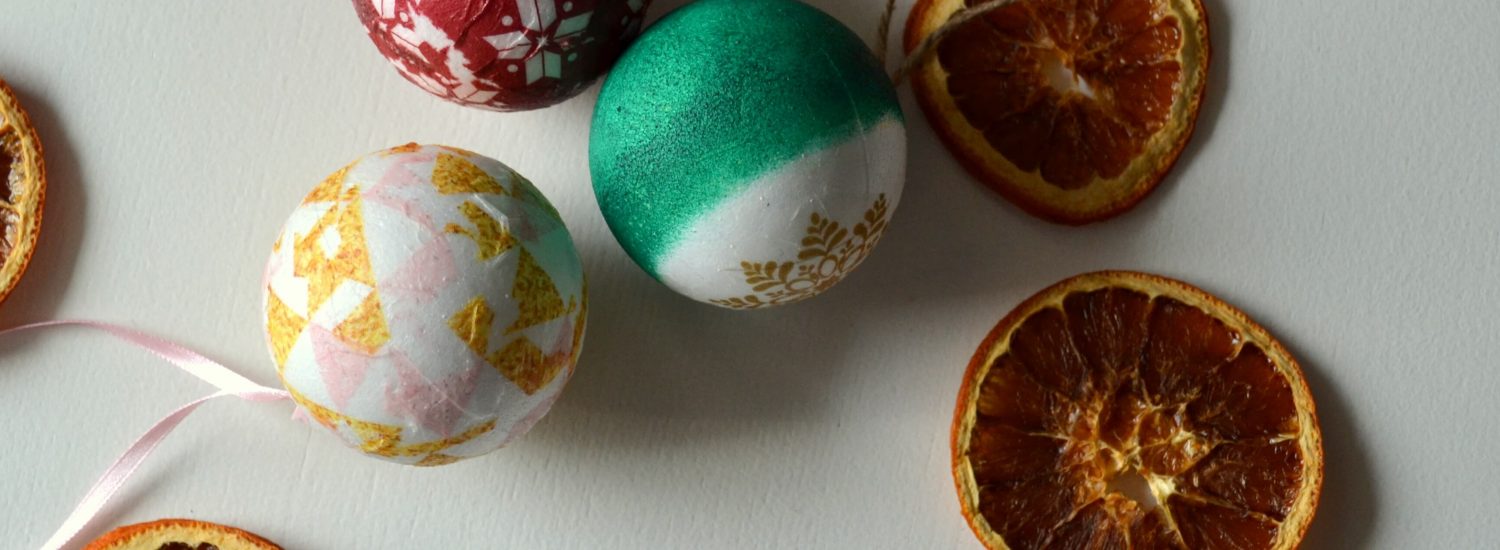
If you are underwhelmed by Christmas decoration trends every year and you wish to go your own way, there is nothing easier than making Christmas decorations according to your own taste. One of the favorite techniques is a decoupage which you can decorate almost anything with. With decoupage you can decorate, for example, Christmas ball ornaments made of polystyrene that you for sure won´t find on any other Christmas tree.
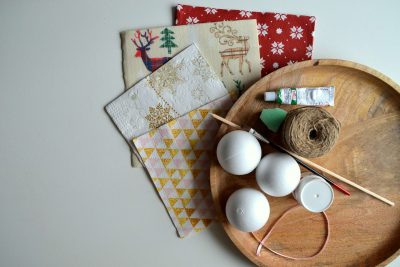
You will need:
- polystyrene Christmas balls,
- napkins with Christmas motifs,
- decoupage glue and varnish in one (you can also buy separate),
- flat brush,
- acrylic color,
- wooden sticks,
- sponge or stippling brush,
- ribbon or cord,
- decorative pins (with a round head).
Working procedure
For an easier job, firstly attach the polystyrene ball to a wooden stick. Choose a napkin with motif that you like and separate the individual layers of the napkin until you have the last and the thinnest one with the motif. You won´t need scissors this time – carefully tear the napkin into small pieces.
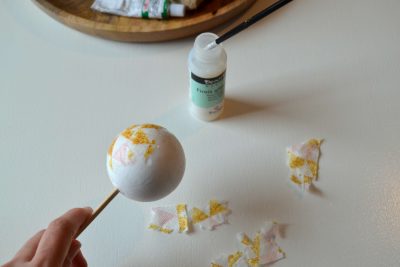
Soak the brush in glue and press the napkin pieces onto the Christmas decoration surface so it is all covered (or however you like it).
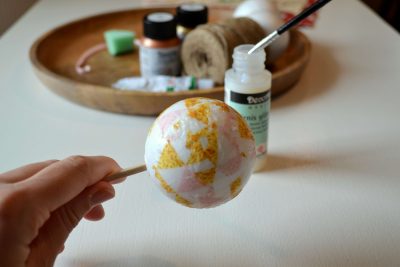
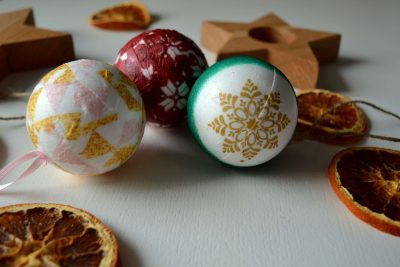
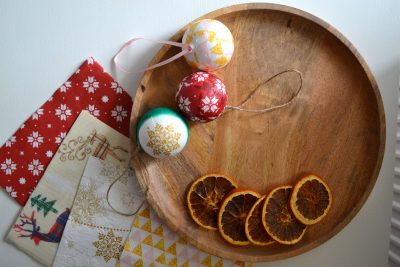
As the first model, we chose the geometric triangles in the gold-pink combination that we randomly glued on the ball. This way a chic Christmas decoration was created in pleasant warm colors.
Christmas red
Red color is essential for Christmas; therefore, our second choice was a beautiful paper napkin with a distinctive white-red pattern. Again, we repeated the previous procedure, we skipped the scissors and gently tore the napkin to keep the whole main motif.
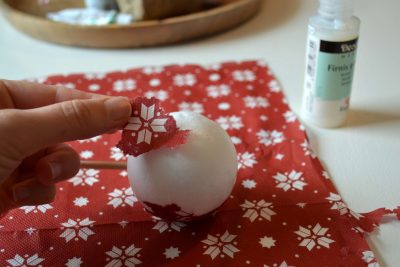
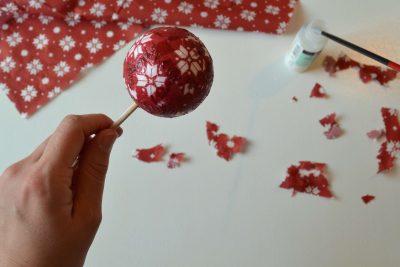
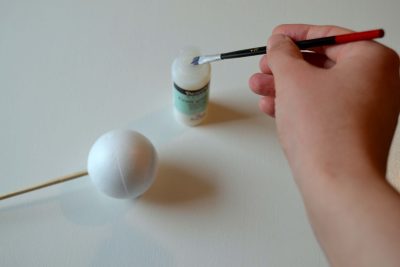
The wooden stick makes the handling of the polystyrene ball easier, and when finished, you can let the ball dry in the vertical position to prevent damage to the glued portion of the napkin.
Combined with color
Finally, we chose a napkin with a motif of golden Christmas snowflakes on a pale background. We again carefully removed the snowflake and glued it onto the middle of the Christmas ball.
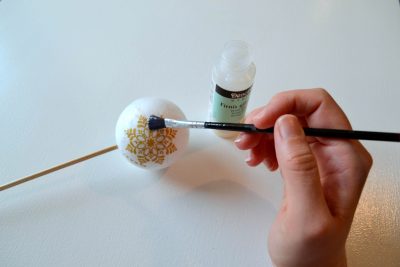
From the back and around the glued motif we painted the ball with a bright green color.
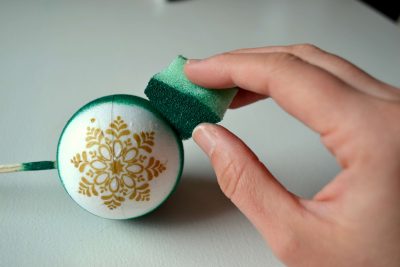
On such polystyrene base, it is convenient to use a stippling brush, so no flat brush strokes are visible. If you do not have it at home, you can also use a regular sponge instead which you find in every house. Cut a piece from it and apply acrylic paint to it. Finally, after drying, finish the ball using varnish. If instead of acrylic colors you decide to use ordinary tempera paint, skip the final step with the varnish. It would blur the color and ruin the final effect.
The last step
Finished varnished and dried Christmas decorations still need a cord for hanging. Take advantage of the hole that remained after removing the wooden stick.
We decided for a satin ribbon and jute cord, you can also use a cotton cord. Cut them for the required length and using a pin stick it into the polystyrene ball. Now you can hang the ornaments on a tree.

Infographics: Napkin folding for kids’ party
Is your child celebrating birthday and you are throwing a party?...
Show more
Herbs – tasty and useful decoration
Herbs in the kitchen are both tasty and useful decoration....
Show more